
React.js MySQL
- Trước khi bắt đầu bài học này, bạn cần biết về tạo API với Express và cách kết nối server với client của project React đã được giới thiệu ở 2 bài học trước, nếu chưa biết thì bạn cần xem lại nhé, kiên nhẫn chút ^^.
- Bài toán xử lý dữ liệu cho React làm một trong những vấn đề khó, phải nói là phức tạp đối với một số bạn bắt đầu học React, tuy nhiên nếu theo đúng trình tự từng bước, thì các bạn sẽ làm được.
- Có 2 kiểu dữ liệu được dùng phổ biến hiện nay cho project React, đó là MySQL và MongoDB, tùy vào mô hình project như thế nào mà các bạn chọn cho phù hợp, cách cài đặt và xử lý không khác gì nhau, ở bài học này, Học Web Chuẩn sẽ hướng dẫn các bạn thực hiện kết nối dữ liệu với MySQL nhé.
- Ta lần lượt tiến hành các bước như sau:
Cài đặt MySQL
- Có nhiều cách cài đặt MySQL, trong bài học này các bạn có thể sử dụng cách cài đặt đơn giản nhất là XAMPP nhé, chỉ ở bước cài đặt và chạy được phpMyAdmin thôi, tạm thời chưa cần làm gì khác.
- Các cài đặt khác không phải XAMPP thì bạn tự tham khảo he, Học Web Chuẩn sẽ có bài riêng chuyên về MySQL sau, còn bài này chỉ tập trung kết nối dữ liệu MySQL vào project React thôi.
Tạo dữ liệu mẫu
- Sau khi cài đặt MySQL xong, bạn cần tạo database và table với thông tin sau (hoặc tùy theo ý bạn):
- Nếu chưa biết cách tạo thì bạn xem lại Tạo database với XAMPP và Tạo table với XAMPP.
Thông tin database
Host mặc định: 'localhost',
Username: 'reactUser',
Password: '1234567',
Tên database: 'reactmysql'
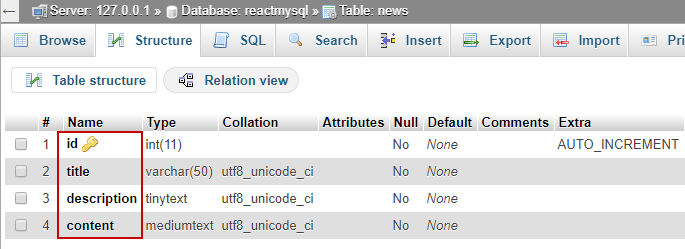
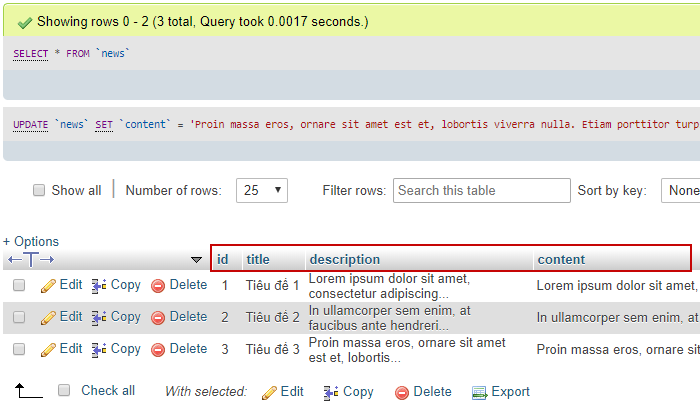
Tạo table "news" và dữ liệu mẫu với thông tin sau:
Sử dụng lại kết quả của bài học trước
- Ở bài học trước ta đã làm hàng loạt các thao tác như: cài đặt, tạo API, kết nối server và client, truyền dữ liệu từ server tới client; do đó nếu chưa biết rõ cách thực hiện như thế nào thì bạn xem lại bài học trước nhé.
- Hoặc bạn có thể download file React Server and Client và tiến hành cài đặt như hướng dẫn tại Github cũng được.
- Ở bài học trước ta có cấu trúc thư mục như sau:
ReactMySQLProject
client
node_modules
- ...
public
- ...
src
 App.js
- ...
- .gitignore
- package.json
- package-lock.json
node_modules
- ...
- app.js
- package.json
- package-lock.json
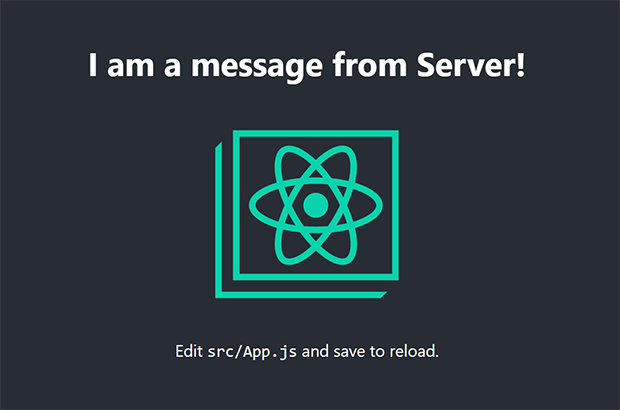
- Khi tiến hành chạy
npm run devsẽ cho ta kết quả:
Kết nối và tạo API truyền dữ liệu
- Trước tiên ta cần kết nối project với MySQL, bằng cách chỉnh lại file
/app.jsnhư sau:
Kết nối database MySQL
const express = require('express');
const mysql = require('mysql');
const app = express();

const connection = mysql.createConnection({
  host: 'localhost',
  user: 'reactUser',
  password: '1234567',
  database: 'reactmysql'
});

connection.connect(function(err){
  (err) ? console.log(err) : console.log(connection);
});

app.get('/api/news', (req, res) => {
  res.json({ message: 'I am a message from Server!'});
});

app.listen(4000, () => console.log('App listening on port 4000'));
const mysql = require('mysql');kết nối với thư việnmysql.onst connection = mysql.createConnection()kết nối tới MySQL và gán với biến connection.connection.connect(function(err){})tiến hành thực hiện một kết nối.
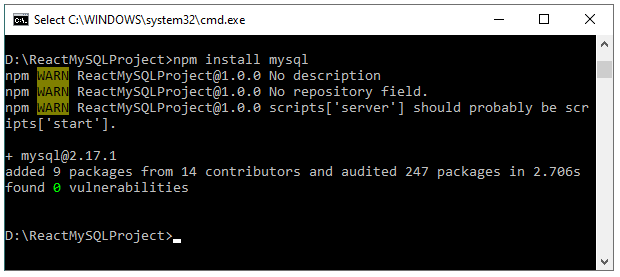
- Để kết nối với thư viện
mysqlnhư trên, chúng ta cần cài đặt MySQL bên trong project, bằng lệnh sau:
npm install mysql
- Chỉnh lại API sao cho có thể gửi dữ liệu table
newslấy từ database MySQL. - Ta chỉnh lại file
/app.jsnhư sau:
Gửi dữ liệu MySQL thông qua API
const express = require('express');
const mysql = require('mysql');
const app = express();

const connection = mysql.createConnection({
  host: 'localhost',
  user: 'reactUser',
  password: '1234567',
  database: 'reactmysql'
});

connection.connect(function(err){
  (err) ? console.log(err) : console.log(connection);
});

app.get('/api/news', (req, res) => {
  var sql = "SELECT * FROM news ORDER BY id DESC";
  connection.query(sql, function(err, results) {
    if (err) throw err;
    res.json({news: results});
  });
});

app.listen(4000, () => console.log('App listening on port 4000'));
var sql = "SELECT * FROM news";chọn dữ liệu tablenewsgán vào biếnsql.res.json({news: results});dữ liệu sẽ được gửi dưới dạng JSON.
Xử lý lấy dữ liệu
- Phần bên trên chúng ta đã xử lý xong phía server gửi dữ liệu rồi, phần này chúng ta sẽ tiếng hành lấy và xử lý dữ liệu.
- Chỉnh lại file
/client/src/App.jsnhư sau:
import React, { Component } from 'react';
import axios from 'axios';

class App extends Component {
  constructor (props) {
    super(props);
    this.state = {
      news: []
    }
  };

  componentDidMount() {
    axios.get('/api/news')
         .then(res => {
            const news = res.data;
            this.setState({ news });
          })
         .catch(error => console.log(error));
  };

  render() {
    return(
      <ul>
        {this.state.news.map(item => (
          <li key={item.id}>
            <h2>{item.title}</h2>
            <div>{item.description}</div>
          </li>
        ))}
      </ul>
    )
  }
};

export default App;
import axios from 'axios';kết nối với thư việnaxiosđã cài ở bài trước.this.state = { news: [] }ngay tạiconstructorkhai báo giá trị arraynews: []ban đầu là rỗng, mục đích để sau đó nhận giá trị mới từ server thông quasetState.const news = res.data;lấy dữ liệu gửi từ server, đồng thời gán với biếnnews.this.setState({ news });cập nhật dữ liệu mới vớisetState.this.state.news.mapsử dụngmapđể tạo danh sách dữ liệu, tuy nhiên lúc này các bạn sẽ nhận được báo lỗi TypeError: this.state.news.map is not a function vì dữ liệunewslúc này nhận về đang ở dạng Object, màmapchỉ xử lý với dữ liệu Array, để giải quyết vấn đề này, ta cần chuyển dữ liệunewstừ Object sang Array ngay tại vị trísetStatenhư sau:
this.setState({ news: news.news });
- Nhìn vào 2 cấu trúc dữ liệu trước và sau, thì các bạn sẽ hiểu tại sao lại có bước gán bên trên:
| Dữ liệu ban đầu: Object | Dữ liệu thay đổi: Array |
|---|---|
{
  "news": {
    "news": [
      {
        "id": 1,
        "title": "Tiêu đề 1",
        "description": "...",
        "content": "..."
      },
      {
        "id": 2,
        "title": "Tiêu đề 2",
        "description": "...",
        "content": "..."
      },
      {
        "id": 3,
        "title": "Tiêu đề 3",
        "description": "...",
        "content": "..."
      }
    ]
  }
}
|
{
  "news": [
    {
      "id": 1,
      "title": "Tiêu đề 1",
      "description": "...",
      "content": "..."
    },
    {
      "id": 2,
      "title": "Tiêu đề 2",
      "description": "...",
      "content": "..."
    },
    {
      "id": 3,
      "title": "Tiêu đề 3",
      "description": "...",
      "content": "..."
    }
  ]
}
|
- Chạy lại
npm run devđể chạy lại project React, khi này trình duyệt sẽ cho ta kết quả sau:
-
Tiêu đề 1
Lorem ipsum dolor sit amet, consectetur adipiscing elit. Sed rutrum ex sed lacus suscipit, a gravida turpis efficitur. -
Tiêu đề 2
In ullamcorper sem enim, at faucibus ante hendrerit vel. In ultrices commodo nibh, tristique imperdiet metus. Maecenas dictum enim ac dignissim scelerisque. -
Tiêu đề 3
Proin massa eros, ornare sit amet est et, lobortis viverra nulla.
- Vậy là xong rồi đó, nếu làm đúng theo yêu cầu thì tới bước này các bạn đã hoàn thành được việc sử dụng MySQL cho một project React được rồi, bạn có thể download source code React and MySQL về để test thử nhé.
Tổng kết
- Sau khi hoàn nội dung bài học, ta sẽ tạo được 2 file
/client/src/App.jsvà/app.jsnhư sau:
/client/src/App.js
import React, { Component } from 'react';
import axios from 'axios';

class App extends Component {
  constructor (props) {
    super(props);
    this.state = {
      news: []
    }
  };

  componentDidMount() {
    axios.get('/api/news')
         .then(res => {
            const news = res.data;
            this.setState({ news: news.news });
          })
         .catch(error => console.log(error));
  };

  render() {
    return(
      <ul>
        {this.state.news.map(item => (
          <li key={item.id}>
            <h2>{item.title}</h2>
            <div>{item.description}</div>
          </li>
        ))}
      </ul>
    )
  }
};

export default App;
/app.js
const express = require('express');
const mysql = require('mysql');
const app = express();

const connection = mysql.createConnection({
  host: 'localhost',
  user: 'reactUser',
  password: '1234567',
  database: 'reactmysql'
});

connection.connect(function(err){
  (err) ? console.log(err) : console.log(connection);
});

app.get('/api/news', (req, res) => {
  var sql = "SELECT * FROM news ORDER BY id DESC";
  connection.query(sql, function(err, results) {
    if (err) throw err;
    res.json({news: results});
  });
});

app.listen(4000, () => console.log('App listening on port 4000'));
- Bài học tiếp theo sẽ hướng dẫn các bạn cách thêm một item bất kỳ, cùng theo dõi nhé.