
React.js xử lý insert
- Bài trước ta đã biết cách hiển thị nội dung dữ liệu MySQL với Express và Axios. Bài này sẽ hướng dẫn các bạn cách thêm một nội dung vào dữ liệu MySQL bằng React.
- Ta lần lượt tiến hành các bước như sau:
Sử dụng lại kết quả bài trước
- Các bạn có thể xem lại bài React.js - MySQL, hoặc download React and MySQL, sau đó cài đặt theo hướng dẫn để có được kết quả nhé.
- Ta lần lược có nội dung các file như sau:
/client/src/App.js
import React, { Component } from 'react';
import axios from 'axios';

class App extends Component {
  constructor (props) {
    super(props);
    this.state = {
      news: []
    }
  };

  componentDidMount() {
    axios.get('/api/news')
         .then(res => {
            const news = res.data;
            this.setState({ news: news.news });
          })
         .catch(error => console.log(error));
  };

  render() {
    return(
      <ul>
        {this.state.news.map(item => (
          <li key={item.id}>
            <h2>{item.title}</h2>
            <div>{item.description}</div>
          </li>
        ))}
      </ul>
    )
  }
};

export default App;
/app.js
const express = require('express');
const mysql = require('mysql');
const app = express();

const connection = mysql.createConnection({
  host: 'localhost',
  user: 'reactUser',
  password: '1234567',
  database: 'reactmysql'
});

connection.connect(function(err){
  (err) ? console.log(err) : console.log(connection);
});

app.get('/api/news', (req, res) => {
  var sql = "SELECT * FROM news";
  connection.query(sql, function(err, results) {
    if (err) throw err;
    res.json({news: results});
  });
});

app.listen(4000, () => console.log('App listening on port 4000'));
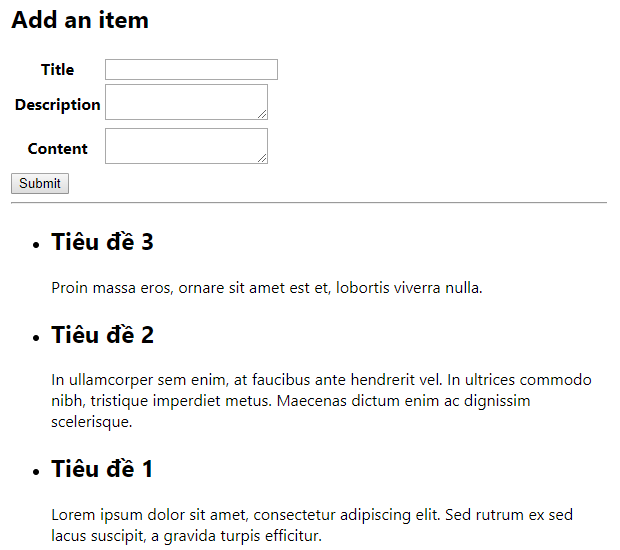
Hiển thị trình duyệt
-
Tiêu đề 1
Lorem ipsum dolor sit amet, consectetur adipiscing elit. Sed rutrum ex sed lacus suscipit, a gravida turpis efficitur. -
Tiêu đề 2
In ullamcorper sem enim, at faucibus ante hendrerit vel. In ultrices commodo nibh, tristique imperdiet metus. Maecenas dictum enim ac dignissim scelerisque. -
Tiêu đề 3
Proin massa eros, ornare sit amet est et, lobortis viverra nulla.
Tạo form nhập dữ liệu
- Để nhập được dữ liệu, ta cần tạo một form nhập với các mục tương ứng, cách tạo và xử lý form đã được giới thiệu tại bài React.js xử lý form, nếu chưa rõ thì các bạn cần xem lại nhe.
- Ta viết lại
/client/src/App.jsnhư sau:
/client/src/App.js
import React, { Component } from 'react';
import axios from 'axios';

class App extends Component {
  constructor (props) {
    super(props);
    this.state = {
      news: []
    }
  };

  componentDidMount() {
    axios.get('/api/news')
         .then(res => {
            const news = res.data;
            this.setState({ news });
          })
         .catch(error => console.log(error));
  };

  render() {
    return(
      <div>
        <h2>Add an item</h2>
        <form onSubmit={this.handleInsertSubmit}>
          <table>
            <tbody>
              <tr>
                <th><label>Title</label></th>
                <td>
                  <input
                    name="title"
                    type="text"
                    onChange={this.handleInputChange} />
                </td>
              </tr>

              <tr>
                <th><label>Description</label></th>
                <td>
                  <textarea
                    name="description"
                    onChange={this.handleInputChange} />
                </td>
              </tr>

              <tr>
                <th><label>Content</label></th>
                <td>
                  <textarea
                    name="content"
                    onChange={this.handleInputChange} />
                </td>
              </tr>
            </tbody>
          </table>

          <button type="submit">Submit</button>
        </form>

        <hr />

        <ul>
          {this.state.news.map(item => (
            <li key={item.id}>
              <h2>{item.title}</h2>
              <div>{item.description}</div>
            </li>
          ))}
        </ul>
      </div>
    )
  }
};

export default App;
- Nội dung form bên trên ta đã tạo sẵn
onSubmit={this.handleInsertSubmit}choform, để khibuttonđược submit thì nội dung nhập sẽ được gửi tới functionhandleInsertSubmit(chúng ta sẽ thêm function này bên dưới nhé). onChange={this.handleInputChange}cũng được thêm sẵn, sẽ liên kết tới functionhandleInputChange, mục đích đã được giới thiệu trước đây: các thành phần form khi được thay đổi, thì ta sẽ lấy được giá trị các thành phần tương ứng.- Chú ý là bên trong
returncần một tag wrap nhe (là tag bao ngoài tất cả), do đó đã sử dụng thêm tag<div>
Hiển thị trình duyệt
Xử lý thêm dữ liệu ở phía client
- Khi thực hiện một thao tác thêm hoặc xóa dữ liệu, thì ta cần thực hiện thay đổi đồng thời ở phía client và server, để khi này ta sẽ thấy dữ liệu như được thay đổi mà không load lại trang. Ta lần lượt xử lý dữ liệu như bên dưới.
- Đối với thao tác dữ liệu ở phía client, ta thực hiện tương tự như bài React.js form kết hợp. Ta viết thêm cho
/client/src/App.jsnhư sau:
/client/src/App.js
Nội dung này viết bên dưới componentDidMount()
handleInputChange = (event) => {
  const target = event.target;
  const value = target.value;
  const name = target.name;
  this.setState({
    [name]: value
  });
};

handleInsertSubmit = (event) => {
  event.preventDefault();

  const newItem = {
      id: '',
      title: this.state.title,
      description: this.state.description,
      content: this.state.content
  };

  let news = this.state.news;
  news = [newItem,...news];
  this.setState({ news: news });
};
handleInputChange- xử lý giá trị được nhập, lấy các giá trị dựa theoname.handleInsertSubmit- xử lý các giá trị khibuttonđượcsubmit.const newItem- khai báo một item mới, với các giá trị là các giá trị được nhập từform.this.state.news- gọi lại dữ liệunews.news = [newItem,...news]- Thêm một item mới vào trước dữ liệunews, có thể thêm phía saunewsbằng cách đổi lại vị trínews = [...news, newItem]this.setState({ news: news });- Cập nhật một array objectnewsmới, đã giới thiệu ở bài trước.
Hiển thị trình duyệt sau khi nhập item mới
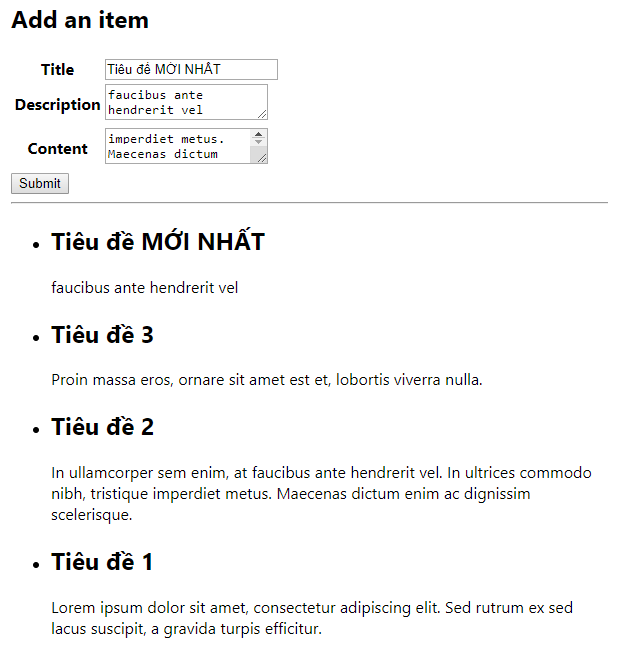
- Vậy là ta đã cập nhật dữ liệu ở phía client thành công.
- Do ở phía client thôi, nên khi reload lại là dữ liệu sẽ mất nhé, để dữ liệu lưu vào MySQL được, ta sẽ thực hiện bước tiếp theo bên dưới.
Xử lý thêm dữ liệu vào MySQL
- Thao tác dữ liệu với MySQL thật ra không khó, cách làm tương tự như view dữ liệu, ta dựa vào Axios để post dữ liệu, tiếp theo đó cần một API để nhận dữ liệu post này và insert vào MySQL.
- Để làm được như trên, ta cần xử lý 2 file như sau:
- /client/src/App.js gửi dữ liệu post thông qua Axios.
- /app.js nhận và xử lý dữ liệu, sau đó insert vào MySQL.
/client/src/App.js
Để cho dễ hình dung, ta viết thêm xử lý Axios trong file hoàn chỉnh như sau:
import React, { Component } from 'react';
import axios from 'axios';

class App extends Component {
  constructor (props) {
    super(props);
    this.state = {
      news: []
    }
  };

  componentDidMount() {
    axios.get('/api/news')
         .then(res => {
            const news = res.data;
            this.setState({ news: news.news });
          })
         .catch(error => console.log(error));
  };

  handleInputChange = (event) => {
    const target = event.target;
    const value = target.value;
    const name = target.name;
    this.setState({
      [name]: value
    });
  };

  handleInsertSubmit = (event) => {
    event.preventDefault();

    const newItem = {
        id: '',
        title: this.state.title,
        description: this.state.description,
        content: this.state.content
    };

    axios.post('/api/insert', newItem)
      .then(res => {
        let news = this.state.news;
        news = [newItem,...news];
        this.setState({ news: news });
      })
      .catch(error => console.log(error));
  };

  render() {
    return(
      <div>
        <h2>Add an item</h2>
        <form onSubmit={this.handleInsertSubmit}>
          <table>
            <tbody>
              <tr>
                <th><label>Title</label></th>
                <td>
                  <input
                    name="title"
                    type="text"
                    onChange={this.handleInputChange} />
                </td>
              </tr>

              <tr>
                <th><label>Description</label></th>
                <td>
                  <textarea
                    name="description"
                    onChange={this.handleInputChange} />
                </td>
              </tr>

              <tr>
                <th><label>Content</label></th>
                <td>
                  <textarea
                    name="content"
                    onChange={this.handleInputChange} />
                </td>
              </tr>
            </tbody>
          </table>

          <button type="submit">Submit</button>
        </form>

        <hr />

        <ul>
          {this.state.news.map(item => (
            <li key={item.id}>
              <h2>{item.title}</h2>
              <div>{item.description}</div>
            </li>
          ))}
        </ul>
      </div>
    )
  }
};

export default App;
/api/insert- cần khai báo giống với route API của/app.js.- Cách làm bên trên ta đã duy chuyển phần thêm item ở phía client vào bên trong phần xử lý dữ liệu post từ Axios, việc này bảo đảm dữ liệu ở client hiển thị sau khi dữ liệu đã post xong, nhằm tránh hiểu nhầm rằng dữ liệu xuất hiện ở client thì cũng có nghĩa là dữ liệu đã được lưu.
/app.js
Ta cũng viết lại hoàn chỉnh file như sau:
const express = require('express');
const mysql = require('mysql');
const app = express();

const connection = mysql.createConnection({
  host: 'localhost',
  user: 'reactUser',
  password: '1234567',
  database: 'reactmysql'
});

connection.connect(function(err){
  (err) ? console.log(err) : console.log(connection);
});

app.get('/api/news', (req, res) => {
  var sql = "SELECT * FROM news ORDER BY id DESC";
  connection.query(sql, function(err, results) {
    if (err) throw err;
    res.json({news: results});
  });
});

app.post('/api/insert', function(req, res) {
  var sql = "INSERT "
          + "INTO news(title,description,content) "
          + "VALUES('"
          +   req.body.title+ "','"
          +   req.body.description + "','"
          +   req.body.content+"')";
  connection.query(sql, function (err, results) {
    if(err) throw err;
    res.json({news: results});
  });
});

app.listen(4000, () => console.log('App listening on port 4000'));
/api/insertđường dẫn route giống với đường dẫn được khai báo tại Axios của file/client/src/App.js- Cấu trúc MySQL thì các bạn tự tìm hiểu lấy nhe, cách viết trên là cách kết hợp MySQL và Javascript thôi, cần cẩn thận dấu câu là được.
- Các giá trị được post từ form sẽ nhận thông qua khai báo:
req.body.title,req.body.description,req.body.content, tuy nhiên để sử dụng được khai báo này, ta cần cài đặt thêm một thư viện "body-parser", ta tiến hành cài đặt như sau:
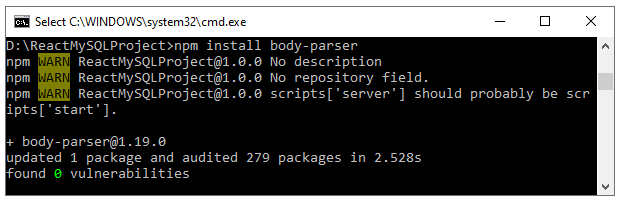
Từ thư mục project (ReactMySQLProject) ở cửa sổ cmd, cài đặt bằng lệnh:
npm install body-parser
Kết quả
- Khai báo thư viện "body-parser" bên trong
/app.jsnhư sau:
const express = require('express');
const mysql = require('mysql');
const app = express();
const bodyParser = require('body-parser');

app.use(bodyParser.json());
app.use(bodyParser.urlencoded({
  extended: true
}));

const connection = mysql.createConnection({
  host: 'localhost',
  user: 'reactUser',
  password: '1234567',
  database: 'reactmysql'
});

connection.connect(function(err){
  (err) ? console.log(err) : console.log(connection);
});

app.get('/api/news', (req, res) => {
  var sql = "SELECT * FROM news ORDER BY id DESC";
  connection.query(sql, function(err, results) {
    if (err) throw err;
    res.json({news: results});
  });
});

app.post('/api/insert', function(req, res) {
  var sql = "INSERT "
          + "INTO news(title,description,content) "
          + "VALUES('"
          +   req.body.title+ "','"
          +   req.body.description + "','"
          +   req.body.content+"')";
  connection.query(sql, function (err, results) {
    if(err) throw err;
    res.json({news: results});
  });
});

app.listen(4000, () => console.log('App listening on port 4000'));
app.use(bodyParser.json())hỗ trợ encoded JSON.app.use(bodyParser.urlencoded({}));hỗ trợ encoded URL.- Chú ý là mỗi khi thay đổi nội dung liên quan tới API, ta đều cần chạy lại
npm run devđể cập nhập code mới.
npm run dev
- Tới đây ta đã hoàn thành việc tạo insert dữ liệu, thử thêm nội dung ta sẽ thấy được kết quả.
Hiển thị trình duyệt sau khi nhập item mới
Tổng kết
- Sau khi hoàn nội dung bài học, ta sẽ tạo được 2 file
/client/src/App.jsvà/app.jsnhư sau:
/client/src/App.js
Do muốn các bạn dễ hình dung, nên bài học không tách component, nhưng khi làm thực tế các bạn sẽ cần tách phần insert ra component riêng, khi đó code sẽ không dài như hiện tại, các bạn có thể thực tập tách component cho mình nhé.
import React, { Component } from 'react';
import axios from 'axios';

class App extends Component {
  constructor (props) {
    super(props);
    this.state = {
      news: []
    }
  };

  componentDidMount() {
    axios.get('/api/news')
         .then(res => {
            const news = res.data;
            this.setState({ news: news.news });
          })
         .catch(error => console.log(error));
  };

  handleInputChange = (event) => {
    const target = event.target;
    const value = target.value;
    const name = target.name;
    this.setState({
      [name]: value
    });
  };

  handleInsertSubmit = (event) => {
    event.preventDefault();

    const newItem = {
        id: '',
        title: this.state.title,
        description: this.state.description,
        content: this.state.content
    };

    axios.post('/api/insert', newItem)
      .then(res => {
        let news = this.state.news;
        news = [newItem,...news];
        this.setState({ news: news });
      })
      .catch(error => console.log(error));
  };

  render() {
    return(
      <div>
        <h2>Add an item</h2>
        <form onSubmit={this.handleInsertSubmit}>
          <table>
            <tbody>
              <tr>
                <th><label>Title</label></th>
                <td>
                  <input
                    name="title"
                    type="text"
                    onChange={this.handleInputChange} />
                </td>
              </tr>

              <tr>
                <th><label>Description</label></th>
                <td>
                  <textarea
                    name="description"
                    onChange={this.handleInputChange} />
                </td>
              </tr>

              <tr>
                <th><label>Content</label></th>
                <td>
                  <textarea
                    name="content"
                    onChange={this.handleInputChange} />
                </td>
              </tr>
            </tbody>
          </table>

          <button type="submit">Submit</button>
        </form>

        <hr />

        <ul>
          {this.state.news.map(item => (
            <li key={item.id}>
              <h2>{item.title}</h2>
              <div>{item.description}</div>
            </li>
          ))}
        </ul>
      </div>
    )
  }
};

export default App;
/app.js
const express = require('express');
const mysql = require('mysql');
const app = express();
const bodyParser = require('body-parser');

app.use(bodyParser.json());
app.use(bodyParser.urlencoded({
  extended: true
}));

const connection = mysql.createConnection({
  host: 'localhost',
  user: 'reactUser',
  password: '1234567',
  database: 'reactmysql'
});

connection.connect(function(err){
  (err) ? console.log(err) : console.log(connection);
});

app.get('/api/news', (req, res) => {
  var sql = "SELECT * FROM news ORDER BY id DESC";
  connection.query(sql, function(err, results) {
    if (err) throw err;
    res.json({news: results});
  });
});

app.post('/api/insert', function(req, res) {
  var sql = "INSERT "
          + "INTO news(title,description,content) "
          + "VALUES('"
          +   req.body.title+ "','"
          +   req.body.description + "','"
          +   req.body.content+"')";
  connection.query(sql, function (err, results) {
    if(err) throw err;
    res.json({news: results});
  });
});

app.listen(4000, () => console.log('App listening on port 4000'));
- Nhằm giúp cho các bạn tự thực hành, do đó phần nội dung download sẽ được chia sẻ ở cuối bài xóa item.
- Bài học tiếp theo sẽ hướng dẫn các bạn cách cập nhật một item bất kỳ, cùng theo dõi nhé.