
React.js project state
- Tiếp theo bài học trước, bài học này ta sẽ tiến hành thay đổi dữ liệu bằng cách dùng setState, ta lần lượt tiến hành các bước sau:
Viết lại /src/App.js theo state.
- Sử dụng kết quả của bài trước, ta viết lại
/src/App.jsnhư sau:
import React, { Component } from 'react';
import './App.css';
import Header from './components/Header';
import Headline from './components/Headline';
import ItemList from './components/ItemList';
import Aside from './components/Aside';
import BoxList from './components/BoxList';
import Footer from './components/Footer';

class App extends Component {
  constructor(props){
    super(props);
    this.state = blog;
  };

  render() {
    return (
      <div id="layout">
        <Header />

        <main>
          <section id="content">
            <Headline bigTitle={this.state.bigTitle} />
            <ItemList itemList={this.state.itemList} />
          </section>

          <Aside />

          <BoxList boxList={this.state.boxList} />
        </main>

        <Footer />
      </div>
    );
  };
};

const blog = {
  bigTitle: 'Consectetur elit proin sit amet neque.',
  itemList: [
    {
      title: 'Proin ex nunc',
      info: 'Proin ex nunc, bibendum ut magna quis.'
    },
    {
      title: 'Blandit mollis',
      info: 'Blandit mollis orci. Ut pretium diam ut tristique interdum amet condimentum.'
    },
    {
      title: 'Donec ut libero',
      info: 'Donec ut libero pretium, efficitur nisl vel, sagittis elit.'
    }
  ],
  boxList: [
    'Placerat arcu vel',
    'Duis at est nunc',
    'Tellus at trist',
    'Ut rhoncus'
  ]
};

export default App;
this.state = blogchúng ta liên kết dữ liệu với state thông quathis.state.- Khi này chúng ta có thể sử dụng
this.stateđể gọi giá trị dữ liệu củablog. - Xem lại trình duyệt, kết quả vẫn không thay đổi.
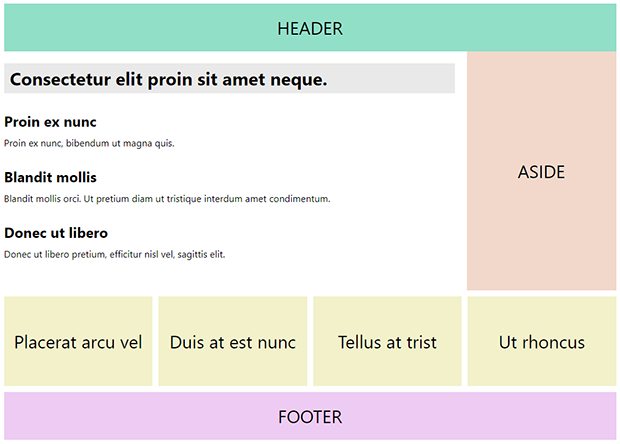
Xử lý thay đổi dữ liệu trong component
- Ta sẽ sử dụng
setStatethay đổi dữ liệu củaItemList. - Trước tiên ta cần tạo
buttonđể thực hiện hành động thay đổi, và tạo dữ liệu thay đổi bên trongsetState, ta tiến hành như sau:
/src/App.js
import React, { Component } from 'react';
import './App.css';
import Header from './components/Header';
import Headline from './components/Headline';
import ItemList from './components/ItemList';
import Aside from './components/Aside';
import BoxList from './components/BoxList';
import Footer from './components/Footer';

class App extends Component {
  constructor(props){
    super(props);
    this.state = blog;
  };

  render() {
    return (
      <div id="layout">
        <Header />

        <main>
          <section id="content">
            <Headline bigTitle={this.state.bigTitle} />
            <ItemList itemList={this.state.itemList} />
            <button type="button" onClick={this.changeItem}>Change Data</button>
          </section>

          <Aside />

          <BoxList boxList={this.state.boxList} />
        </main>

        <Footer />
      </div>
    );
  };

  changeItem = () => {
    this.setState({
      itemList: [
        {
          title: 'Title changed',
          info: 'Proin ex nunc, bibendum ut magna quis.'
        },
        {
          title: 'Blandit mollis',
          info: 'New information changed.'
        },
        {
          title: 'Donec ut libero',
          info: 'Donec ut libero pretium, efficitur nisl vel, sagittis elit.'
        }
      ]
    });
  };
};

const blog = {
  bigTitle: 'Consectetur elit proin sit amet neque.',
  itemList: [
    {
      title: 'Proin ex nunc',
      info: 'Proin ex nunc, bibendum ut magna quis.'
    },
    {
      title: 'Blandit mollis',
      info: 'Blandit mollis orci. Ut pretium diam ut tristique interdum amet condimentum.'
    },
    {
      title: 'Donec ut libero',
      info: 'Donec ut libero pretium, efficitur nisl vel, sagittis elit.'
    }
  ],
  boxList: [
    'Placerat arcu vel',
    'Duis at est nunc',
    'Tellus at trist',
    'Ut rhoncus'
  ]
};

export default App;
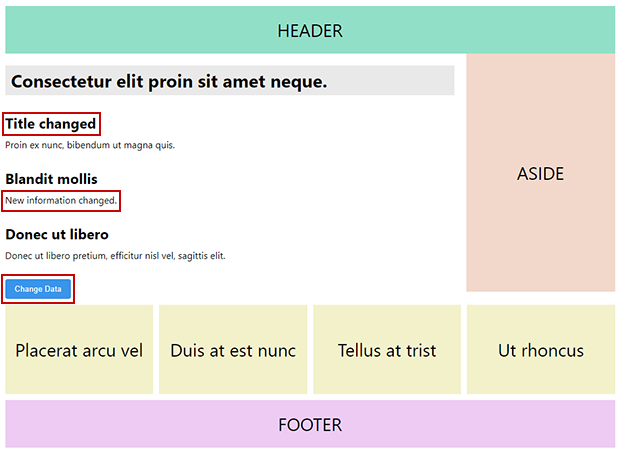
- Vậy là xong rồi đó, chạy lại trình duyệt, click vào
buttonta sẽ thấy được dữ liệu mới sẽ được cập nhật như trong hình.
- Tới đây các bạn đã biết thao tác cho một project React như thế nào rồi he: add một template mẫu vào project và thực hiện các thao tác dữ liệu đơn giản như: view, update.
- Những nội dung tiếp theo sẽ giúp các bạn thực hiện một bộ project hoàn chỉnh: view, insert, view detail, update, delete từ một dữ liệu thực tế.